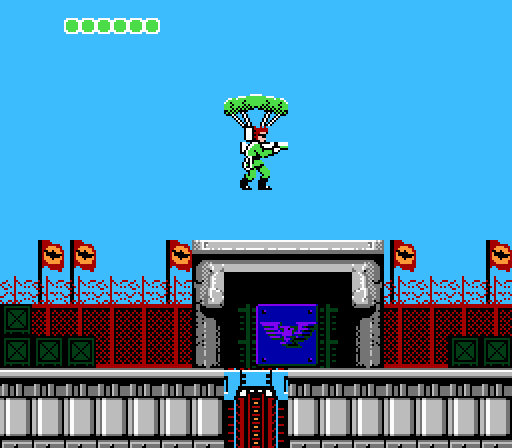
This is the end, beautiful friend. All that swinging around like a loon and collecting bullets from the corpses of defeated foes in order to incorporate the strength of the dead into your own essence leads to this: Area 12, the Empire’s headquarters. A below-ground concrete bunker surrounded by concertina wire and fascist emblems.
Area 12 is not the most difficult stage in the game, but it definitely is the lengthiest and most complex.
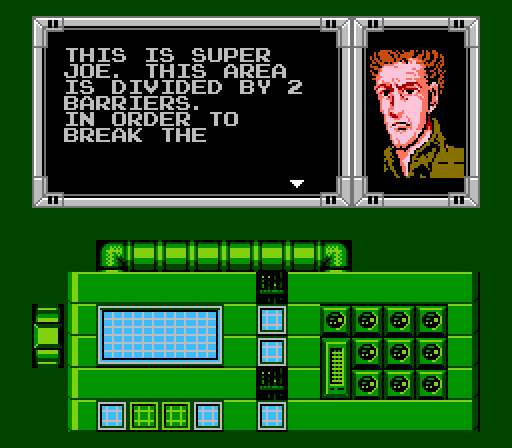
In fact, it’s so complex that your first radio communication consists of Super Joe (who is off blowing up bad guys in another portion of the base) tells you how you’ll need to get through to the end. A tutorial in this day and age!?
Your real goal in Area 12 is to descend to the most heavily protected portion of the Empire’s command post, a dozen floors underground. To get there, you need to travel down three different elevators across two separate zones. Elevators two and three are each protected behind impenetrable electrical barriers, and in order to break down the barriers you need to destroy their shield generators. These are the same generators you’ve been blowing up at the end of other Areas; the Empire’s base has several.

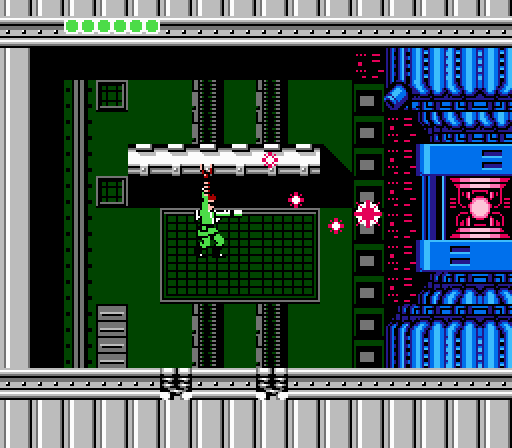
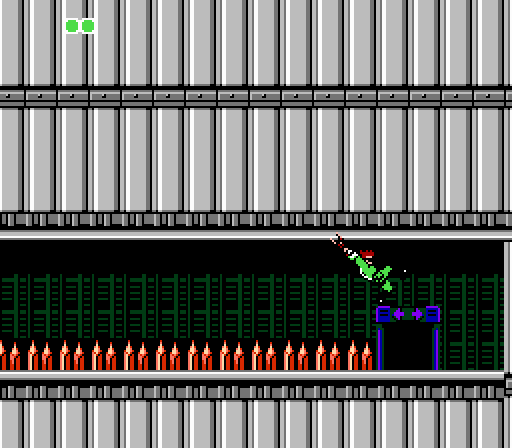
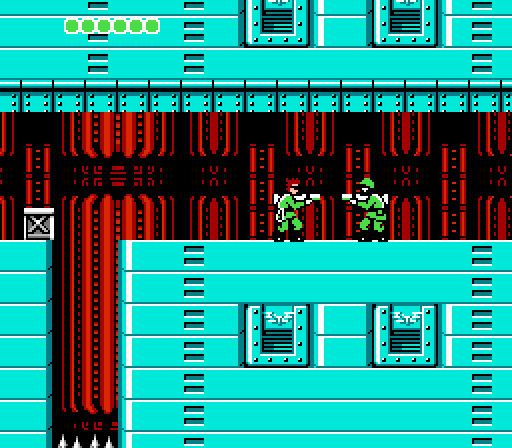
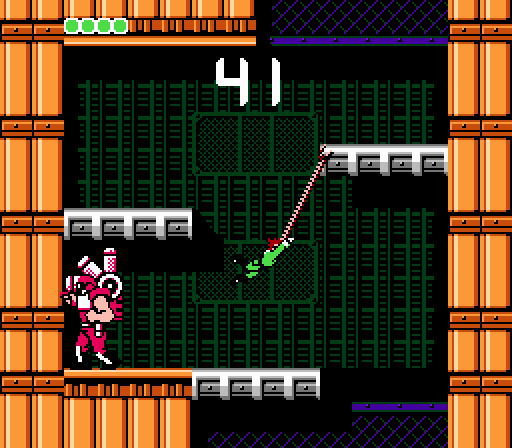
You’ll find the shield generators located at the bottom of rooms branching off the main elevator shafts. You need to descend to the bottom of each while avoiding the electrical sparks that surge along the floor. Do you recognize this scene? You should, if you’ve been reading all the different Anatomy of Games series I’ve written. This is a definite reference to Donkey Kong Jr.
Just as Area 6 called back to the original Donkey Kong with its hulking soldiers tossing spiked balls that rolled downhill to impede your progress, here at the end Bionic Commando again throws out a winking nod to the series that invented platforming as a way of showing off its own unique variant on the genre by way of contrast. Where Junior simply needed to hop over the sparks that ran along the electrified floors in stage three of his game, Captain Spencer needs to take a more measured and cautious approach. You can’t simply run and jump here, meaning there’s no room for quick reactions; you have to tackle this sequence methodically, planning ahead for each surge and pulling yourself to safety.
The flow of these scenes therefore unfolds differently than it would in a different kind of platformer. It’s less about forward momentum and more about timing — of being willing to make slow forward progress as you play it safe. It’s a great little touch, a small reminder that, yes, Bionic Commando does things its own way, and that makes for a different game experience.
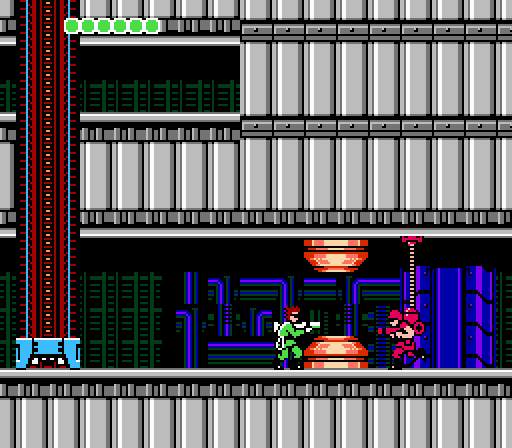
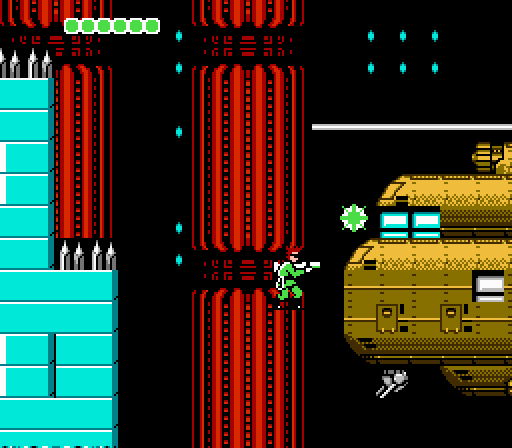
The mid-stage power generators sit in much smaller rooms than the cores of previous stages. You need to bounce up to grapple the low ceiling in order to draw a bead on the generators, but these fights are pretty mild: One generator fires at you with a triple-spread weapon mounted above it, while the other is guarded by paratroopers. Depending on your weapon choice in Area 12, this can be over quickly or immediately; if you use a short-range gun like Joe’s Machine Gun, you need to move in closer to the generator. But if you’re still using the ol’ reliable Rocket Launcher, you can probably take out the core before its counterattack even makes it to where you’re hanging.
In any case, once you’ve taken out a core, you need to climb back up the Donkey Kong Jr. sequences — though this is a much quicker process than making your way down.
With the barriers down, you simply need to swing over past these beam emitters that block the path. There are very few soldiers in this stage — these bionic troops are about it. It’s curiously light staffing for the enemy headquarters, but this is explained away by the fact that Joe is creating a murder-diversion while you take out the automated defenses.
After clearing two elevator screens, two spark rooms, and two generator cores, you descend to the lowest level of the Empire’s inner sanctum. At this point they’re not even being subtle, with a low corridor lined by spikes to keep out unwanted intruders. By now, this is child’s play for a cool bionic commando like you, of course.
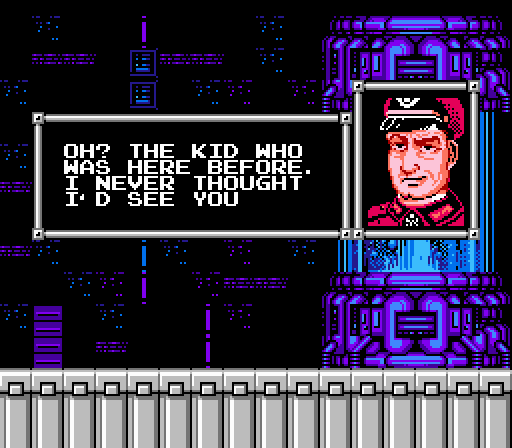
And within the final room of the bunker, you once again encounter Generalissimo Killt, who recognizes you from your early encounter in the Neutral Area. He taunts you and says it’s no longer necessary to revive Master-D, since his engineers managed to get the “Albatros” superweapon functioning without the dead man’s help.
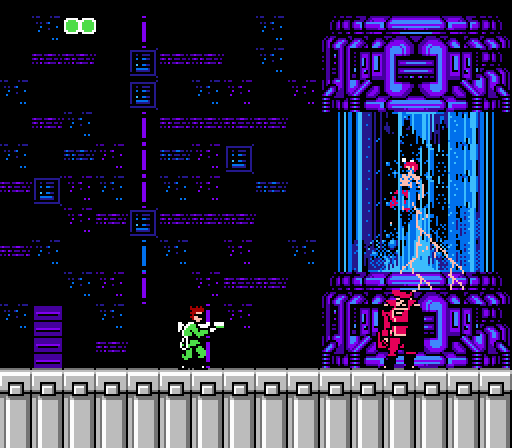
Master-D, however, has other ideas, somehow electrocuting the general from within his Bacta tank.
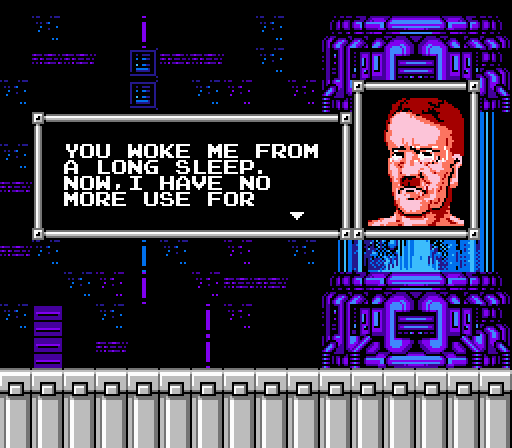
And in case you weren’t really clear on this whole “Master-D” thing, his dialogue portrait should help clear things up. He thanks Killt by murdering him, then sneers at your defiance, making his escape while setting the Albatros into motion.
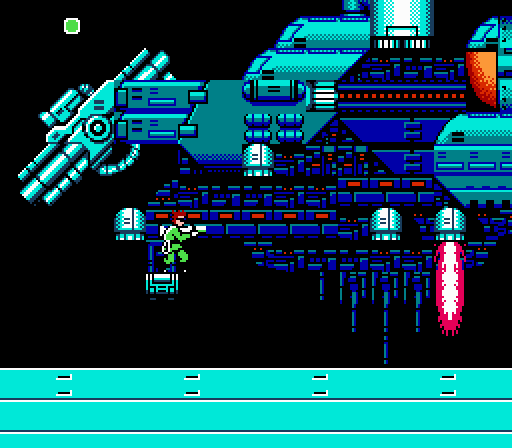
And this, then, is it. The focus of the entire game, the Fourth Reich’s scheme to complete Hitler’s ultimate WWII super weapon, the Albatros. The exact nature of the thing is hard to parse, but evidently there’s a large multi-barreled gun on its head. Maybe it fires mobile nuclear warheads from a rail gun or something.
In any case, I suspect what you’re seeing here is a sort of cutaway view, with the viewer-facing armored surfaces of the weapon having been removed in order to expose the interior element you’re meant to shoot at (the orange glowing semi-circle at the upper right). In other words, this is meant to be a threat only Captain Spencer can take care of, because the weapon’s weak core is heavily armored from the outside. Yes, the bad guys didn’t leave a weak point exposed for just anyone to see. They’ve broken the rules of video games.
So you, bionic commando, have to climb up inside the Albatros to where its vulnerable exhaust port is located. This is more easily said than done. The Albatros moves constantly back and forth while the seven rocket thrusters that evidently keep it aloft fire off in sequence. The core you need to target is only on-screen for a few seconds at a time, and the way the thrusters cycle means that the only points you can hang onto to aim at the core are often ignited; the thrusters are the only elements of the Albatros you can grasp, and the area directly ahead of the target consists of two thrusters. So you have to plan your approach to the core carefully to make sure you time your movements to avoid gouts of flame.
Once you manage to swing up to where the core is, it takes several shots with even the Rocket Launcher to destroy the thing, and you only have time for a single shot per cycle. God help you if you picked a less powerful weapon. To add to the trickiness, the Albatros is designed in such a way that you have to begin your approach from the small platform to the lower left very deliberately. If you stand too far forward as you start to ascend, you’ll actually swing upward in an arc that peaks too late to grab onto the thrusters at the top, wasting your effort.
It’s a lot to take in, and even though the Albatros consists entirely of passive danger — it doesn’t shoot at you, and no soldiers appear to take potshots, either — it requires careful timing and placement, not to mention the ability to make your approach with precision.
Should you manage to persevere against the war machine, it explodes — but that’s not the end of Area 12. There’s still a zombie dictator to deal with, after all. The exit route leads to a hangar where you meet, at long last, Hal.
I haven’t mentioned Hal much in these write-ups, but if you go to the trouble of wire-tapping and communicating with the chopper crew in the latter stages of the game, you’ll hear multiple references to (and even speak directly with) a solider named Hal. Evidently he’s a bit of a rogue element; the chopper commander blurts something about how dangerous he is. And I suppose he is, at that, having stolen an advanced weapon prototype and inexplicably making his way into the heavily guarded hangar beyond Hitler’s oxygen tent.
It seems Der Führer took out Hal on his way to his escape route, but with his dying breath the soldiers hands off his stolen prize and tells you that Hitler’s helicopter is below, and that you can stop him only with a carefully placed shot into the vehicle’s cockpit.
You get one shot at this as you swing over the edge and plummet past the nose of Hitler’s plane. Time your shot perfectly — it seems this super-gun fires the indestructible barrier element from the POW power-up, hence the wild-eyed descriptions of its force — and it sails into the chopper’s exposed canopy. Miss, and even the best gun in the game can’t dent the vehicle’s forward armor plating.
If you miss, you don’t have to wait long for a second chance. The chin turret on the chopper immediately opens fire, killing you instantly. How anticlimactic! Fortunately, you get another shot for as many lives as you have, respawning immediately before talking to Hal. If you have to continue, you still resume here in the hangar rather than being forced to fight through Area 12 again.
But really, this is a perfect climax for the game, really and truly driving home the unique nature of its mechanics. In other platformers, jumping and shooting is the order of the day; here, you can’t do that. You climb, drop, and then shoot. This is the ultimate example of that style in action.
And if you do make the shot…
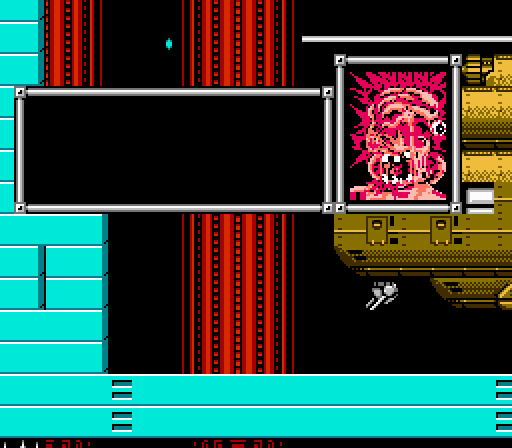
Gross. This was quite a shock back in the squeaky clean NES days, lemme tell ya.
Oh, but even after making Hitler’s brain thoroughly ineligible for preservation in a jar, the game still isn’t over. Bionic Commando takes one last page from another Nintendo platformer and forces you to manage a Metroid-like timed escape up a vertical shaft. You have 60 seconds to climb out of the hangar. No problem, right?
Right, except for this guy. The enemy pits you against one last Robocop dude (who, for all I know, is meant to be the same guy you’ve faced before, revived over and over as your rival). He blocks the exit route, patrolling a stretch of ground that breaks the upward verticality of your ascent. You’re forced to deal with him… though how you go about that is at your discretion.
You can deal with him directly, taking the time to put a bazooka round or three in his face. You can try to avoid him, zipping up and past before he has a chance to thwart your advance. Or you can actually use his attack pattern to your advantage, allowing him to grab you and draw you in, then using the recoil you take from suffering damage to bring you closer to the upper platform and pulling yourself quickly out of his range. By this point, you’ve dealt with this guy enough to know his patterns and how best to cope with them… provided you don’t let the rolling countdown numbers rattle you.
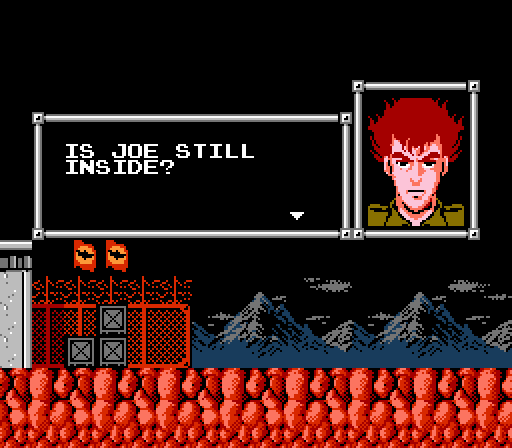
Once you reach the end of the escape route, Captain Spencer realizes that Super Joe is still inside and turns back around to retrieve him. Fortunately at this point the game is over and everything plays out automatically… though, coincidentally, the next title we’ll look at in Anatomy of Games uses this idea for an actual play mechanic.
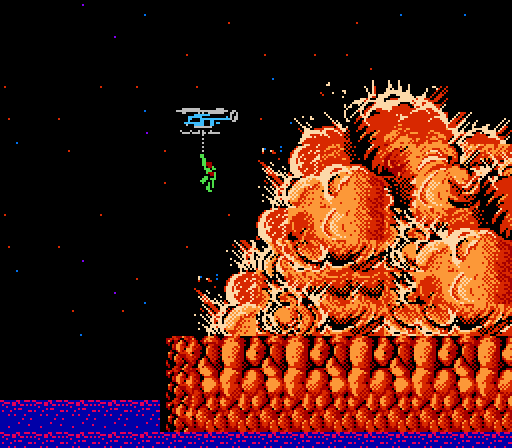
And we have the obligatory “enemy base EXPLOD” ending so popular among NES games. Contra, Metal Gear, Ninja Gaiden, the Castlevanias… actually, those are mostly Konami games. No wonder people always mix up Capcom and Konami. The big C was biting off the other studio’s style here.

And we learn the events of Bionic Commando took place in what was, in 1988, the near-future. I believe that the date numeration there is meant to suggest you saved the world on the 4th of July. Patriotic!

And just to make you feel mortal, it turns out the entirety of the game came from Super Joe’s memoirs now that he is, as he says himself, old. Breaking the classified seal on the time they re-killed Hitler because he’s all wrinkly like Clint Eastwood and to hell with the consequences.
This framing device, though? It was set four years ago. Yep. Joe is probably dead now. And soon, we will be too.
But before we go to the great beyond, let’s reconvene tomorrow to share one final short piece on Bionic Commando.
Hmm, never thought of the view of the Albatross as a cutaway before, but it makes sense. That thing wasn’t in Rearmed though, was it (it’s been a while)? If not, that’s too bad, as they could probably have given that a proper effect.
That helicopter bit at the end sure took a good few tries to get down, too.
Rearmed expanded the Albatros into its own stage. I don’t remember an equivalent to that boss battle, but there was a very difficult platforming segment on the outside of the airship in the middle of the stage.
Yeah, that sequence was actually adapted from the Game Boy remake (and Elite Forces).
I never knew that. I should really get the GB game…
It’s like $3 on Virtual Console, so there’s really no excuse, man.
In relation to the date, it most likely follows the Japanese convention of year/month/day. So in this case, April 7th (at least I’m assuming that). Fantastic write-up on the game by the way, it really is amazing (the game and write-up).