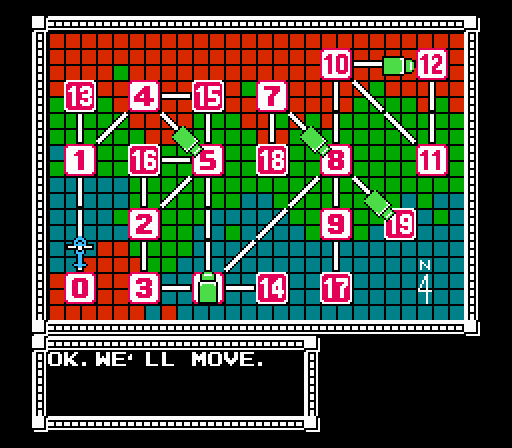
With Area 1 conquered, you return to the overworld map, hovering above the ruins of your conquest. At this point, you’re given three options for transferring to other areas: Area 0, which is pointless; Area 4, which angles away and leads into the bulk of the map; and Area 13, which appears directly above Area 1 in an isolated cul-de-sac.
Visually, the game nudges you toward Area 13 here. Not only does it appear suspiciously isolated there on its own, your chopper points toward it by default. There’s no reason not to go to Area 13 next.
Of course, you don’t have to. The game gives you the option to skip ahead or Area 4 or in fact any map point on the present side of the divide beyond Area 6. For instance, you may think, “Ah, it’s best to tackle the map in numerical order” and advance to Area 2. That’s fine. But you can’t take this approach too far for several reasons — not least of which being that tackling Area 4 before visiting Area is a tremendous mistake.
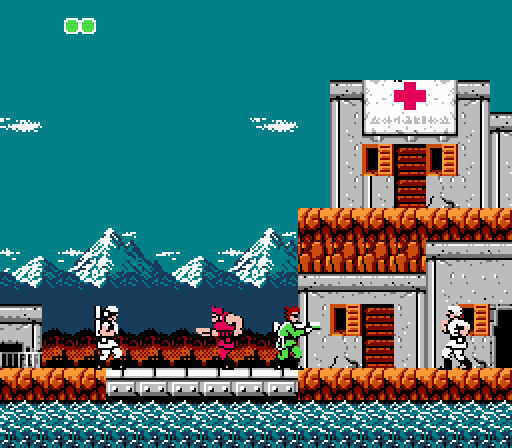
Despite its higher numeration, Area 13 doesn’t represent a greater threat than Area 1. On the contrary, it’s no threat whatsoever. Like all other map points depicted as maroon icons, Area 13 is a Neutral Area where enemies wander but don’t exist. Given the white uniforms and the distant mountains, Neutral Areas are like tiny Switzerlands. Actually, Swiss uniforms aren’t white, but they feel like they should be.
Anyway, the rule behind Neutral Areas is simple: You don’t attack anyone and you won’t be attacked. Theoretically. In some cases, you may encounter foes who use melee attacks — and you can actually smack people with your Bionic Arm. You can also murder with impunity inside building interiors, for some reason.
However, if you fire your weapon in the outdoor portions of a Neutral Area, you will be swarmed instantly by an infinite array of Swiss soldiers out to put an end to you and your non-neutral ways. What could turn a man’s heart neutral? We may never know, but they sure do take it seriously.
It’s pretty easy to freak out the first time you enter a Neutral Area and see a soldier making a beeline for you, a bayonet held straight ahead. But you can’t kill him; as soon as you pull the trigger, he’ll vanish along with all the other NPCs in the area, replaced by the neutral army. If you hold your fire, the enemy soldier will taunt you, but he won’t attack. Meanwhile, you can gather intel from the non-hostile soldiers who populate the area; some useful, some not.
Each Neutral Area contains a couple of rooms that you can duck into. These almost always contain items, tips, or bullets to gather for experience. In Area 13’s case, one of the rooms contains this handy item: Flares. These slot into the “active gear” slot in Captain Spencer’s inventory selections at the beginning of the level and can be activated with the Start button once equipped.
This might seem a little self-defeating, since the bonus for completing Area 1 was the Energy Recovery Pills, which also go into the same slot — and you can only have one item active at a time. Were the pills pointless!?
No, as it turns out. Only in Area 4.
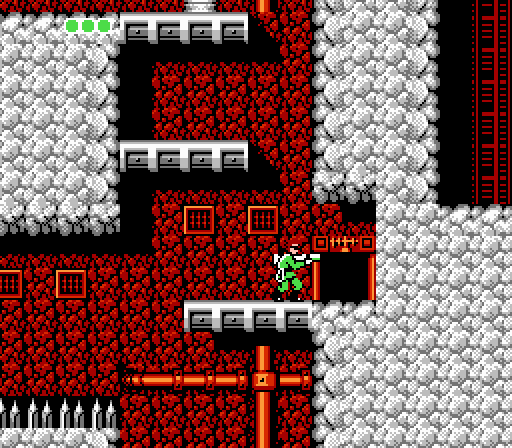
You descend into a narrow chasm in Area 4 (Captain Spencer is wicked awesome at parachuting). You can see woods and mountains in the background; it’s quite picturesque. To the right you see a low entrance into the rock outcropping. You step inside the doorway, and bam! HDR! The screen goes completely black; you can’t see.
But of course, you can toss the flares into the air and light your path. NPCs in the Neutral Area clued you into this fact! Assuming you went there. If you didn’t go to Area 13 first, well, this will probably be a short experience for you. Unless you know about the secret level exit command on controller two (which is not mentioned in the instruction manual, alas), you’ll have to stumble through the dark…
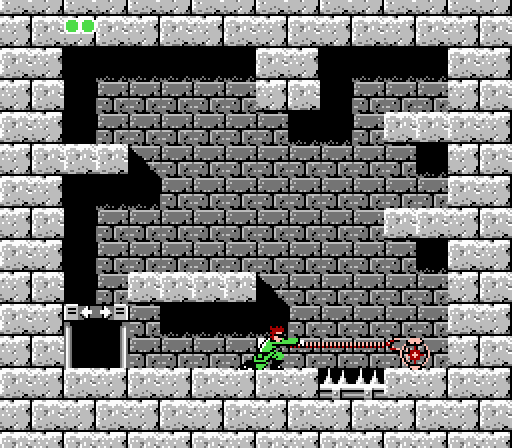
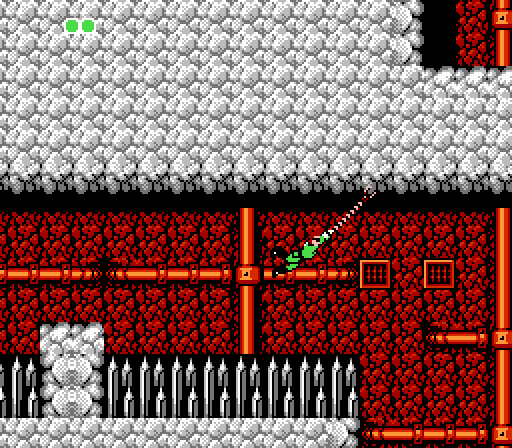
…which is a super terrible idea, because Area 4 is lined with tons and tons of spikes. There’s about a 50-50 split between solid flooring and spikes here. In the dark, you’re probably going to have a short and unhappy life. And unless you happened to encounter a convoy on the area map, you’ll almost certainly encounter a game over here.
It’s not impossible to get through here without the flares, mind you! I wasn’t kidding about the HDR; when you first enter the cave, the screen goes completely black… but after a moment, Captain Spencer’s eyes adjust to the dark and the highlights of rocks and spikes become faintly visible in a midnight blue against the black. It’s a cool little touch… and a fun way to challenge your Bionic Commando skills once you get a feel for the mechanics.
As an act of mercy, Area 4 is far smaller than Area 1 one. The cave interior comprises less space than the Area 1 base interior alone, and there’s no equivalent outdoor space. There’s also only a single communication room to deal with. While Area 1 offered a little taste of multiple challenges, Area 4 revolves almost entirely around learning to make use of your tools (the Flares) and swinging clear of spikes. The new opponent here is the bayonet soldier — well, he appeared in Area 13, too, but here he can actually cause you quite a bit of pain. He requires several shots to take down, and he dashes toward you when you enter his line of sight. Area 4 is smaller than Area 1, yes, but it requires more precise control over the Bionic Arm and faster reactions against quick-moving enemies in tight spaces.
Area 4’s interior space beyond the communication room also offers players two possible routes forward. You can take the obvious path straight ahead, grappling around a number of small platforms over pits of spikes; or you can take the advanced route by swinging along the ceiling and sneaking up through a narrow platform that bypasses the room of tiny handhold. Both offer their own challenges, but the upper route is designed in a way such that only advanced players who fully understand the inner workings of Bionic Commando will recognize it as a possible path.
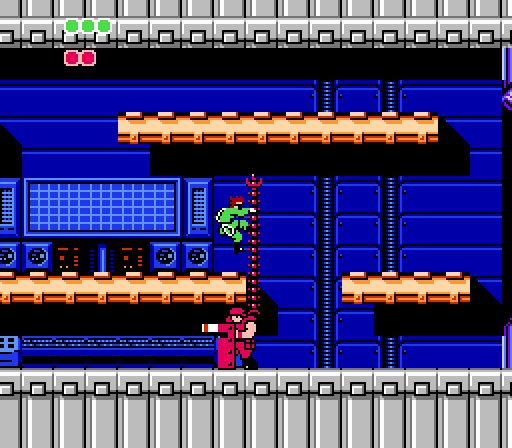
And inside the reactor room at the end of the stage, you don’t have to deal with the swarms that appeared in Area 1. Instead, there’s another… bionic commando? This guy lacks your awesomeness; he’s thoroughly grounded, a thick and heavy trooper toting a massive riot shield and capable of alternating between a gun and a knife. His bionic arm is strictly for offensive purposes, not for navigation; he walks around on the floor and flings his wire arm upward when he pulls up directly beneath you.
Like your own arm, his doesn’t cause physical harm; it can only send you reeling. However, he can keep smacking you over and over, eventually knocking you to the ground, where he can plow into you with his bayonet. In order to have a chance of defeating him, you need to swing behind him, drop down, turn, and immediately fire… three times, because he has two pips of health.
Similar to the enemies in Area 1’s reactor, the bionic soldier will vanish once you destroy the main system. However, you can’t simply stand and pump bullets into the reactor with the beefy dude patrolling beneath you; you have to either draw him away from the reactor or figure out a way to defeat him. In either case, he’s the trickiest foe you’ve faced so far, with the saving grace that you don’t have to beat him.

“tackling Area 4 before visiting Area is a tremendous mistake.”
Missing the number “13” here.
Another thing: The only reward for completing Area 4 is the Wide Cannon, which isn’t required and isn’t really a very good weapon in general, so you never need to complete Area 4. I usually skip the whole stage and go right to Area 5, for the Rocket Launcher, which I then use for the rest of the game.
Yeah, I’ll get into the question of which stages are actually required to finish the game in a later update.